¶ Laser Cut Map - Make Santa Fe
ExploreHere got a 10x10 booth space at Route 66 RoadFest in Tulsa, OK. This is the first conference or festival where we'll have our own booth! I wanted to design an interactive experience so visitors could learn more about us and have some fun chatting along the way.
We came up with the idea of designing iconography for various landmarks along Route 66 and having visitors guess which state each landmark is in. (Think Cadillac Ranch, the Blue Whale, the Golden Driller, etc.)
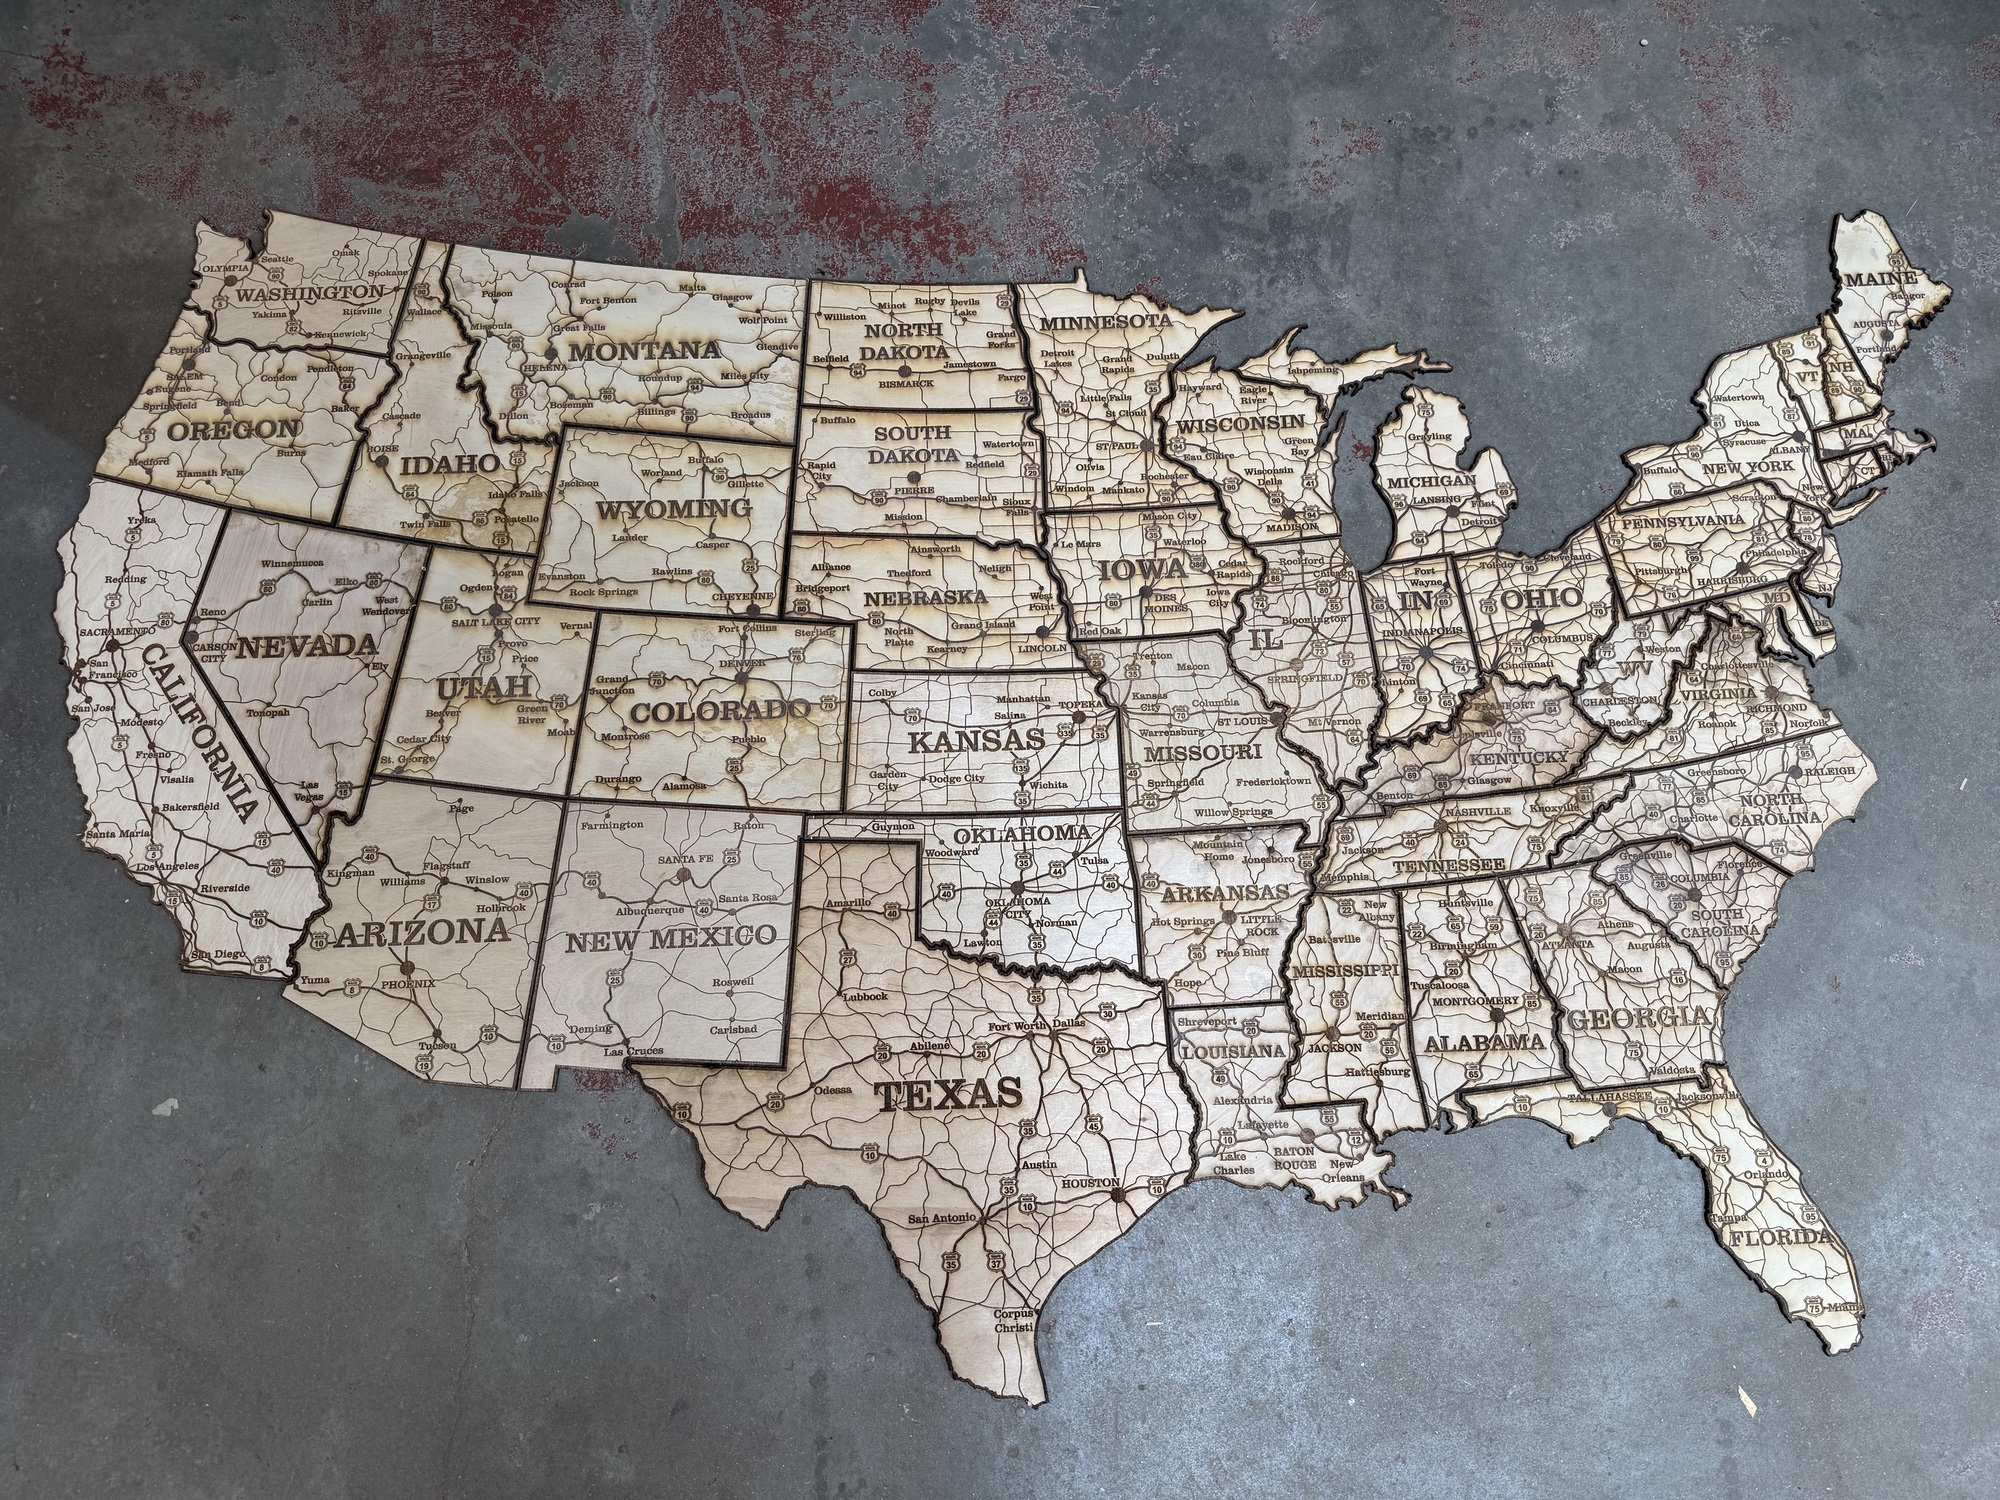
The centerpiece and key interactive element is a map. I looked online for print maps, but I wanted something with a bit more oomph. I had just finished another project (a split flap display build) where I went to Make to learn how to use the laser cutter, and I figured I could put those skills to use and just laser cut a map out of plywood!
So, I set out to design my own map. I found an SVG outline of the US, pulled outlines of the highway system, and started layering text on top. This took a while, and when I went to export it I realized the laser cutter requires each shape to be separate and non-overlapping. If I stick some text like "Santa Fe" over a highway line, the laser will cut the highway, then fill "Santa Fe," leaving a line that's deeper than both the standard text and the highway lines.
Designs for the laser have to be built a certain way, with the slicer in mind.
Disheartened (I really didn't want to make a bunch of mask layers and split my SVG lines into sub-lines), I turned to the internet to see if someone had already done the work. To my surprise, there are a few designers selling their designs online. My favorite was ~this one on Etsy~. $70 is a bit pricy for a design file, but it would have taken me a full week to make my own version, so I saved myself the headache and bought it from Ivan over on Etsy.
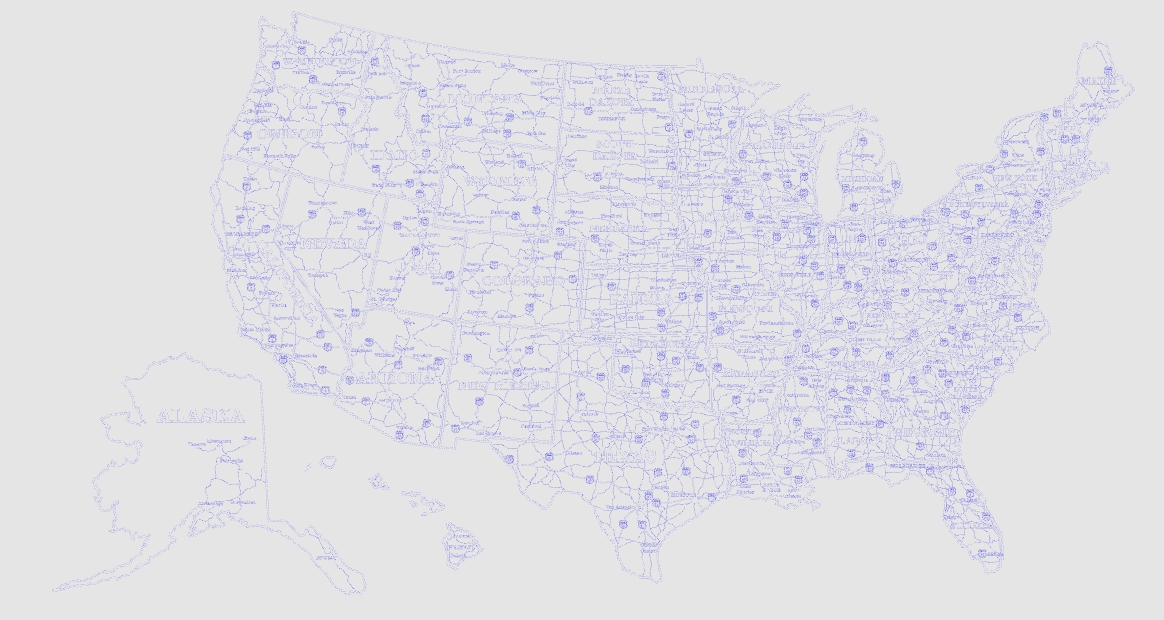
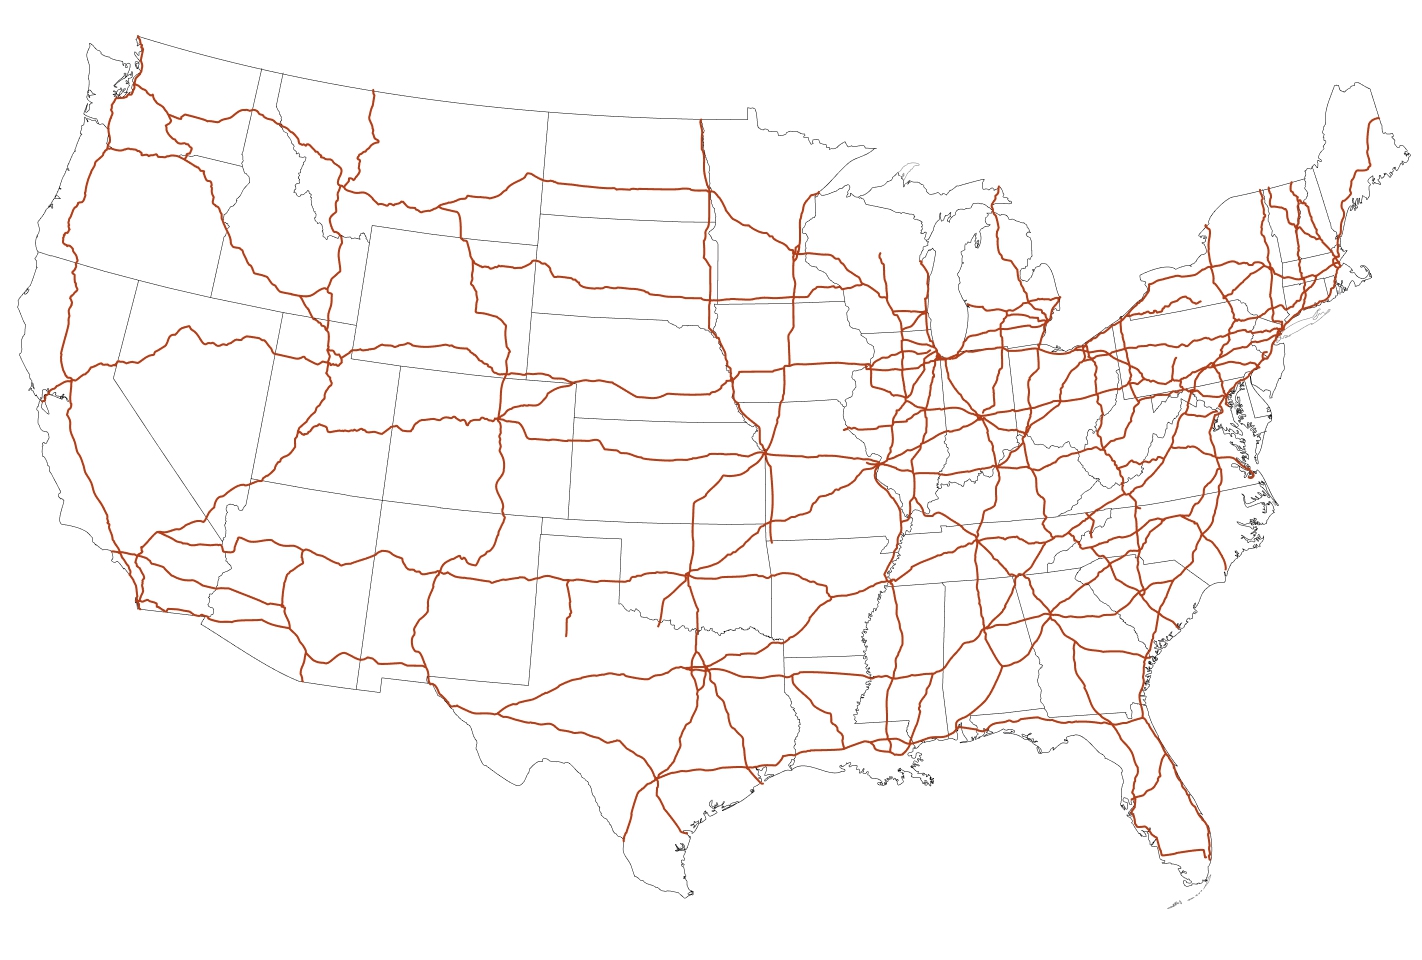
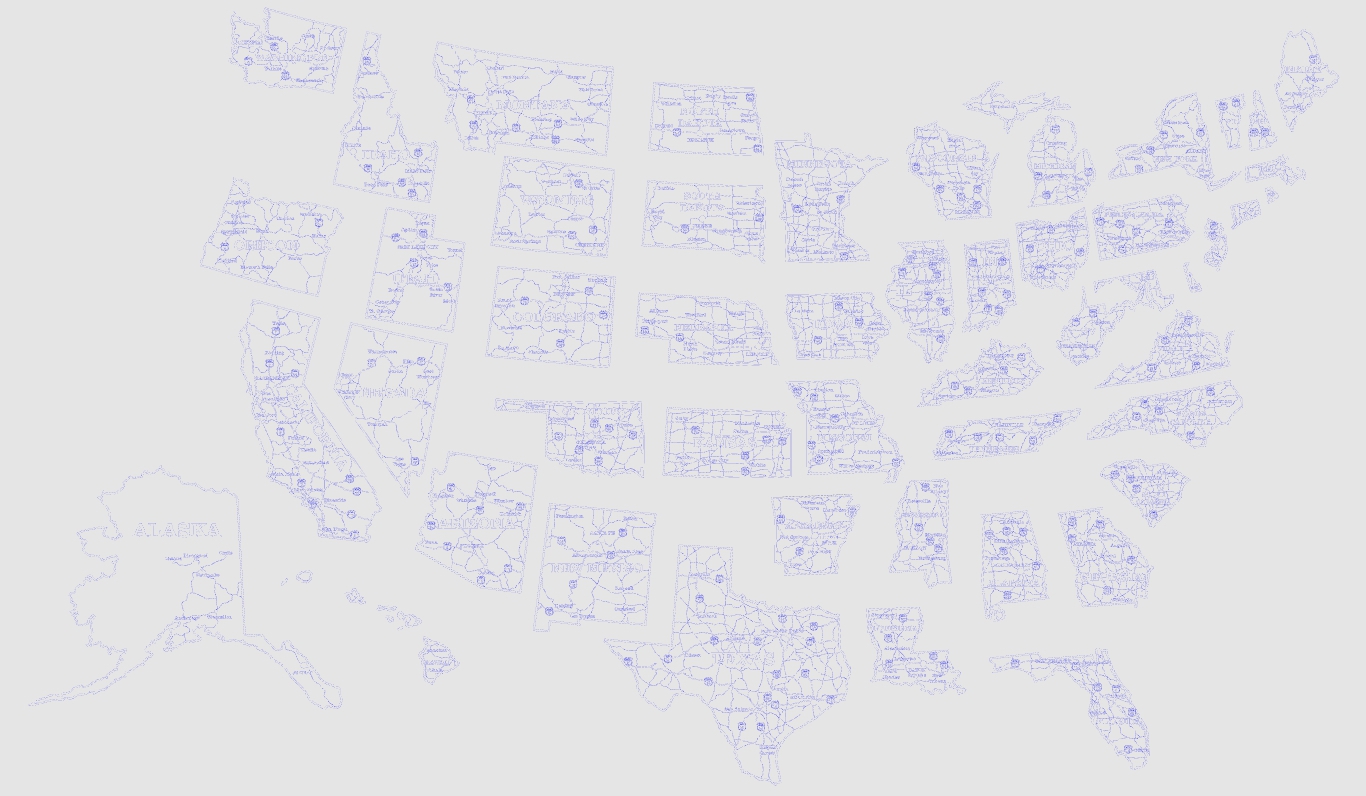
The design files get emailed to you automatically, and Ivan had them split into several formats and options, notably an "all in one" map or all the states split out. Since I wanted a map larger than the BOSS laser's work bed, I had to break it into parts, and the easiest way was to do each state separately. The file was designed to be laser cut, so there are two lines: one set to "cut" on the laser, and another set to "fill."
I imported the SVG into LightBurn on my own computer and laid out the configuration and tests before heading into Make. I calibrated the laser settings using a few circle and square tests. I highlighted my first state and ran the previewer, and to my surprise it said 30 minutes to complete Oklahoma. If every state took 30 minutes, then we'd be looking at 25 hours of job runs. I did not expect it to take that long.
I learned a few optimization tricks:
-
Speed and power are correlated. Technically the fastest job would max out power (80% on the BOSS) and just change the speed depending on whether you're filling or cutting. Maxing out the power worked well for my project, but for super detailed work, slowing the speed down and being more controlled is probably safer.
-
Overshoot. As the laser moves back and forth it has to accelerate and decelerate, and the software automatically calculates this and shows the overshoot in the LightBurn preview. When the laser overshoots to slow down, that's wasted time and distance the laser has to travel, so optimizing the print order to minimize overshoot helps reduce cut times.
- In practice this means it's generally faster to place objects next to each other (along the x axis; left and right) than it is to stack them on top of each other (along the y axis), since overshoot seems to only happen on the x axis (at least with how the BOSS motors are set up).
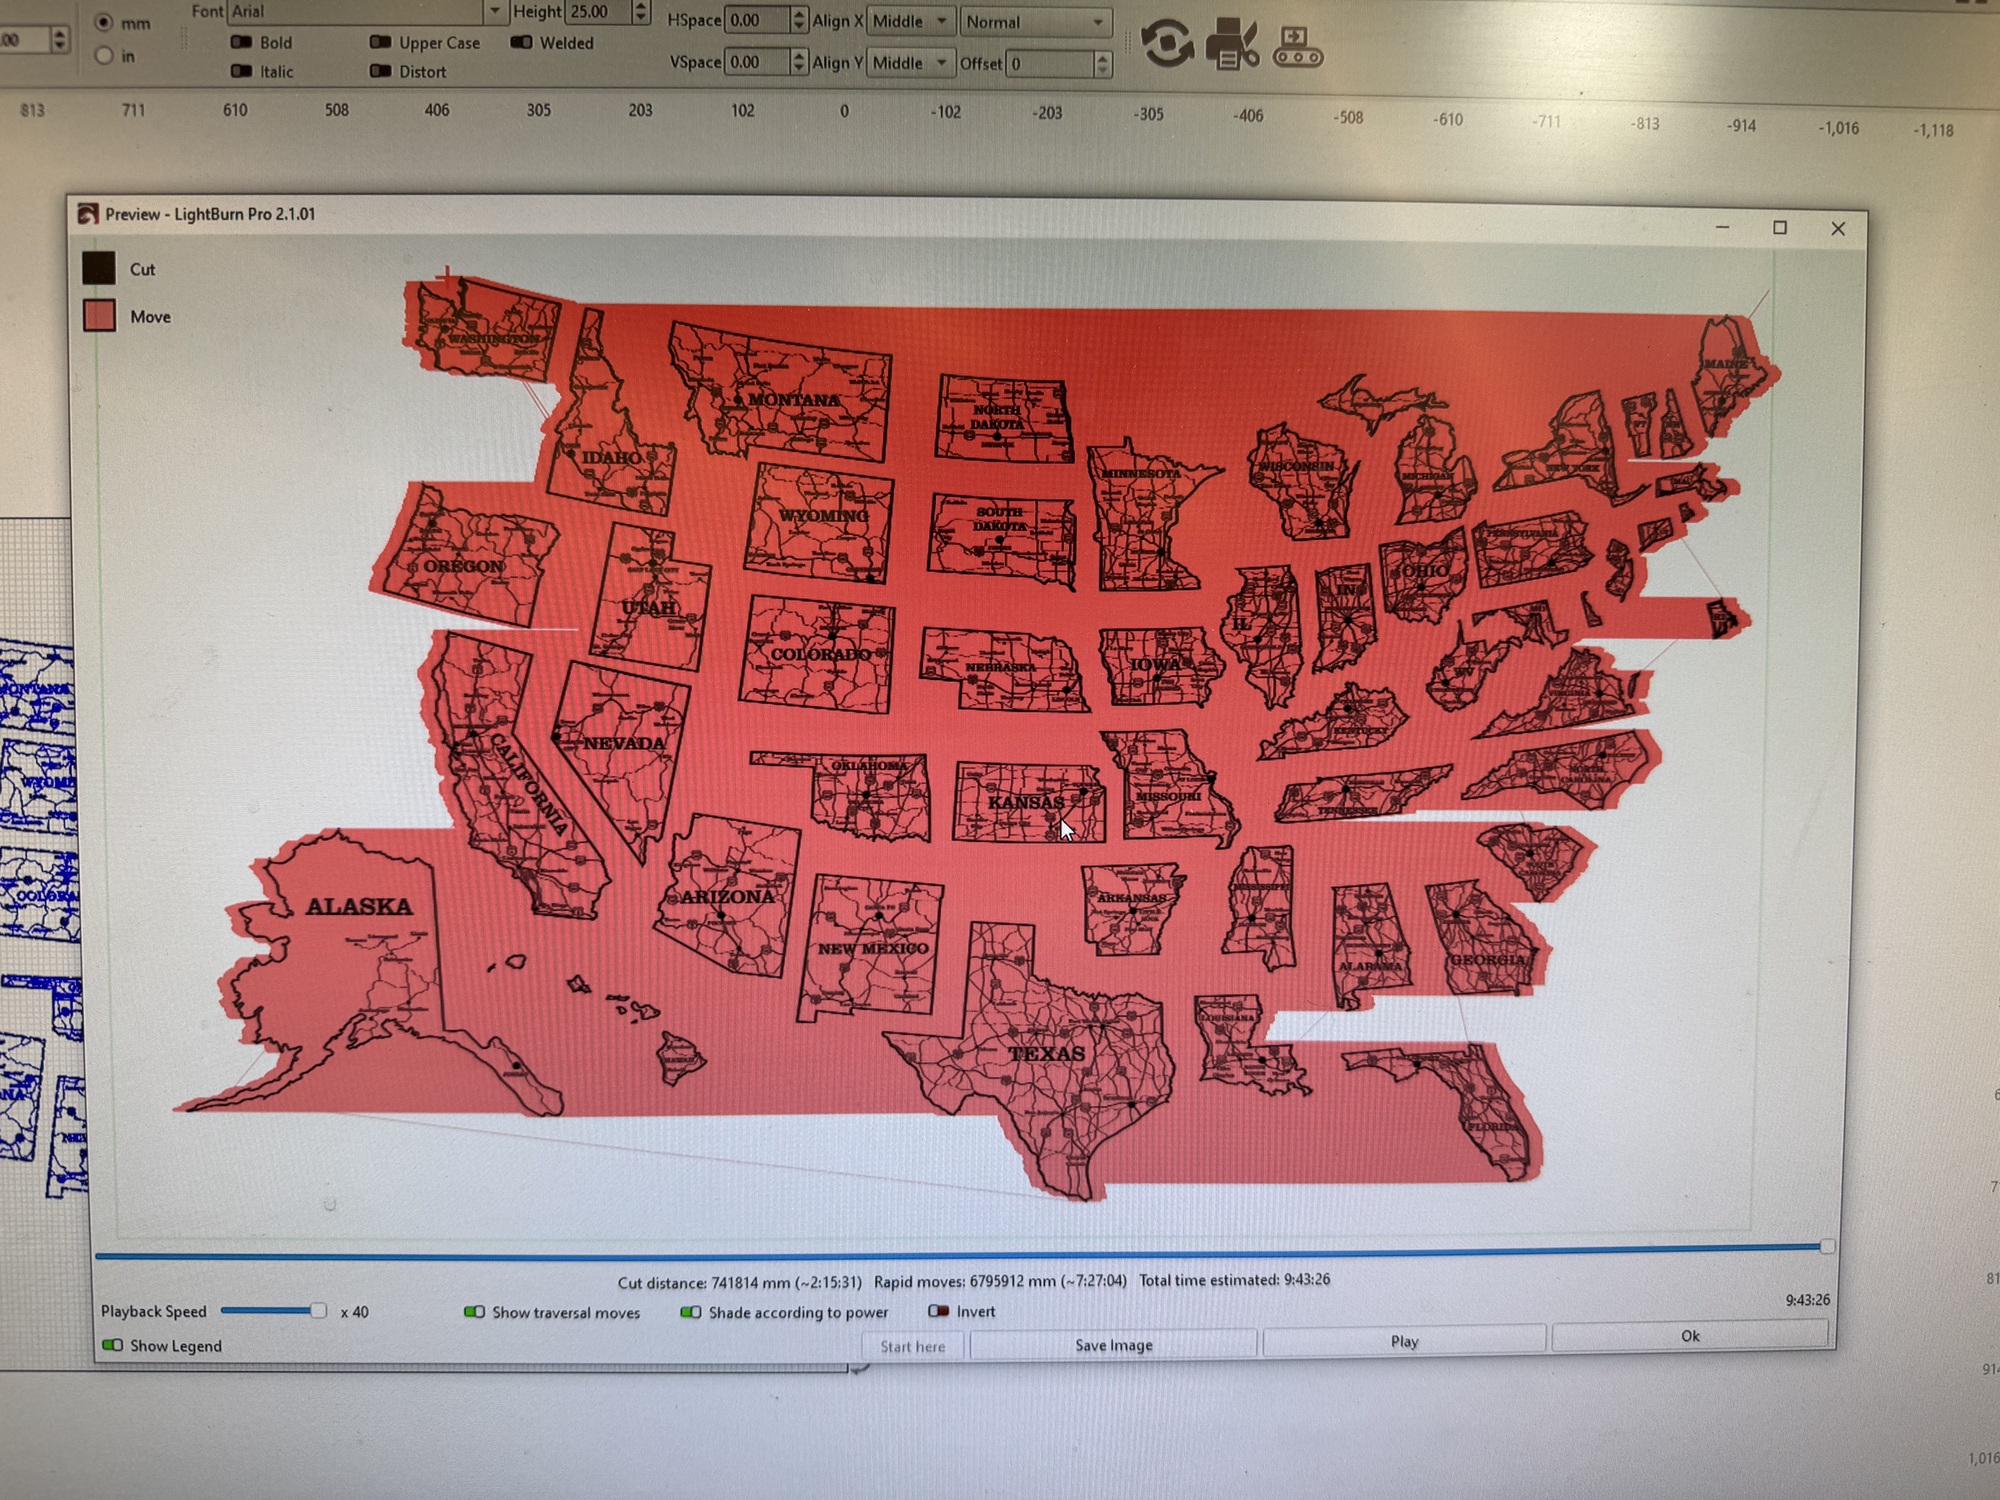
- In the image above, between Maine and Washington State, there's a ton of travel the laser has to do that won't produce any output. Minimizing that wasted movement makes for a faster cut. (Note: this time estimate is before I scaled it up 2x, which jumped the job from just under 10 hours to over 20.)
- In practice this means it's generally faster to place objects next to each other (along the x axis; left and right) than it is to stack them on top of each other (along the y axis), since overshoot seems to only happen on the x axis (at least with how the BOSS motors are set up).
-
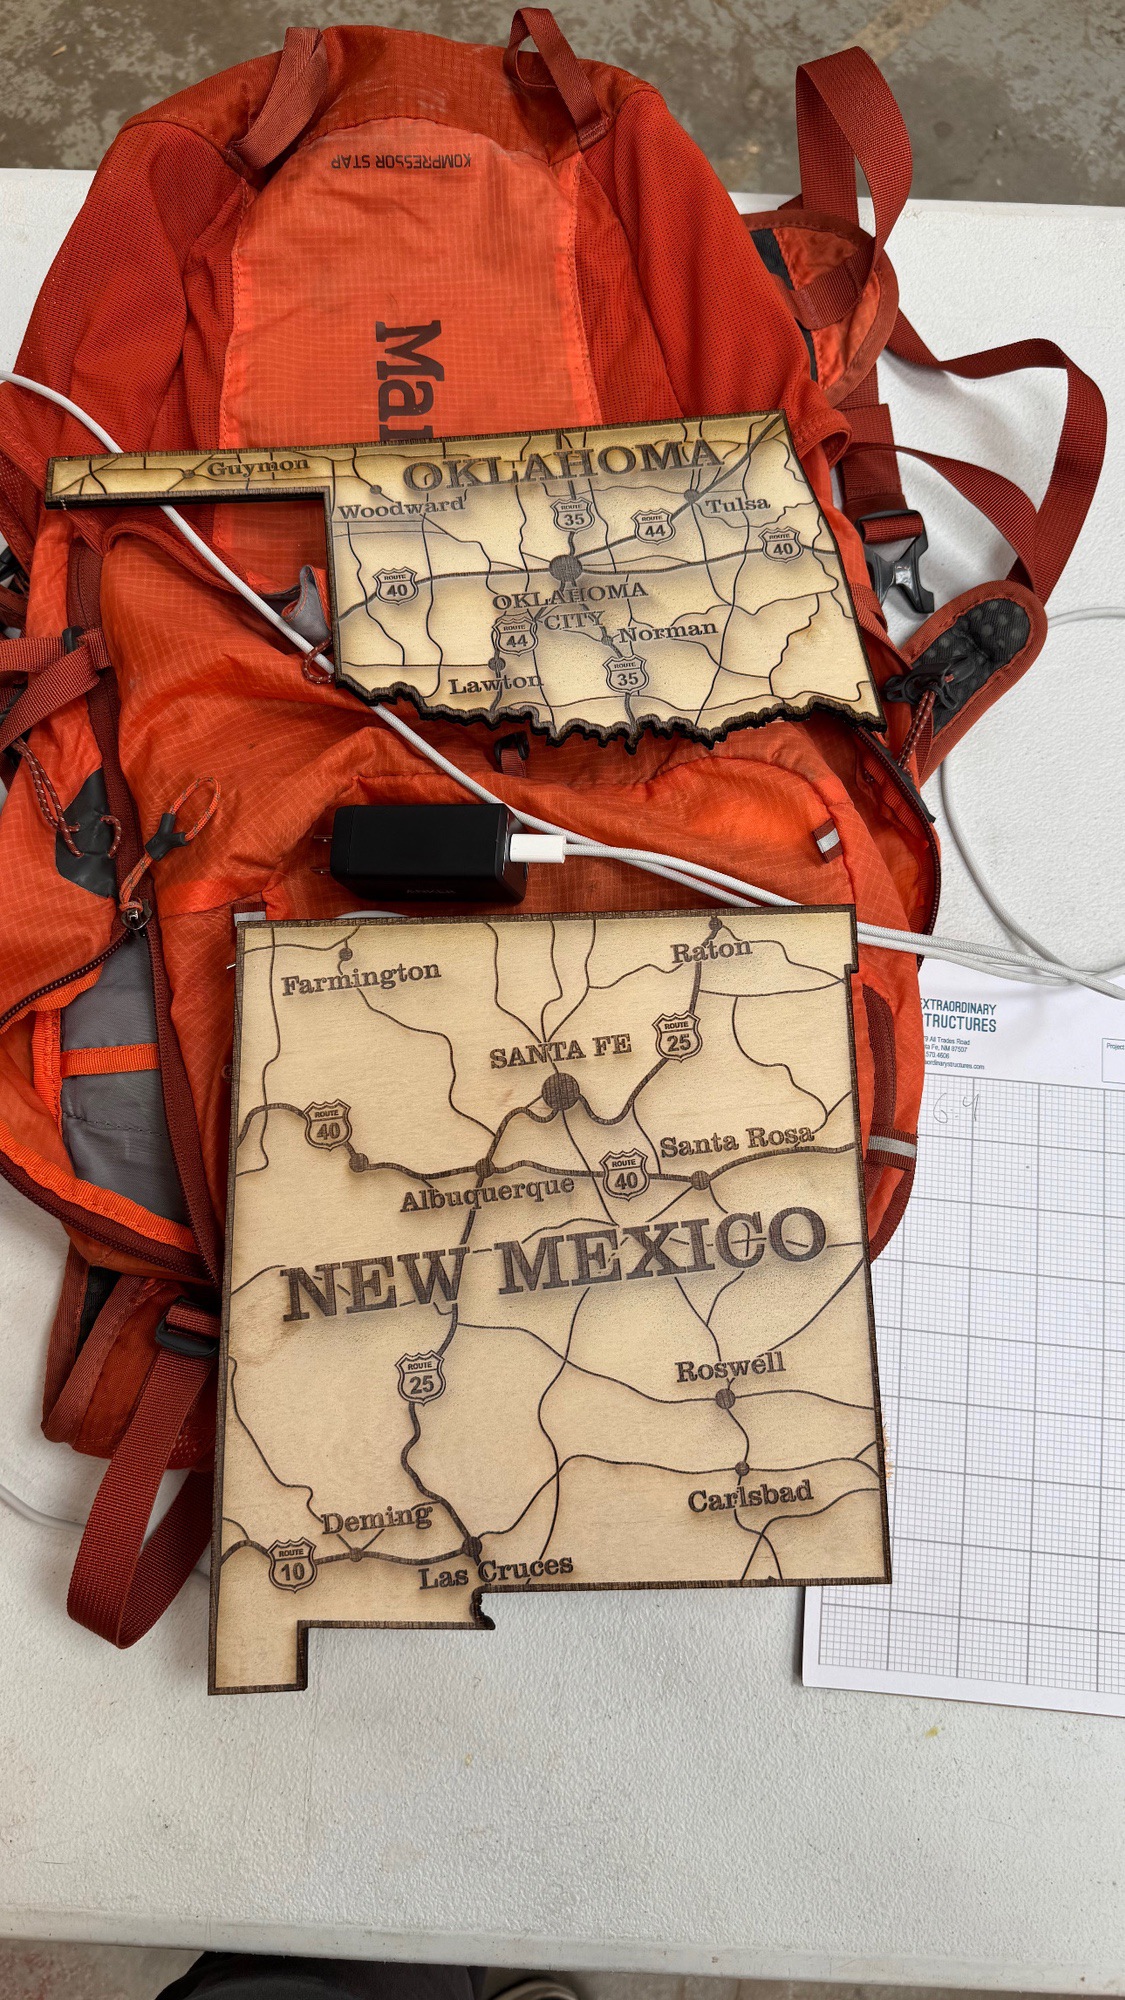
Line Interval. The laser moves back and forth like a printer, there’s a setting in Lightburn to increase the distance between lines. I increased the Line interval from a default of .1mm to .15mm, which cut down my job time by ~30%! That was hours saved. This isn’t without tradeoff, the fill goes less deep than with .1mm, but for what I wanted out of the map, the fill was plenty deep with .15. You can actually see the difference in the photo above of New Mexico and Oklahoma. Oklahoma has the default .1mm and New Mexico has .15mm, which produced a less deep fill. Shoutout to Andrew for helping me with this one!
-
Fill in the gaps. If the preview shows the laser traveling along a path with nothing happening under part of it, that's essentially free time. If you add another fill in that empty space, it produces the same estimated time. So if the laser is traveling large sections without engraving, it's often best to drop a smaller object in there, since it's basically free.
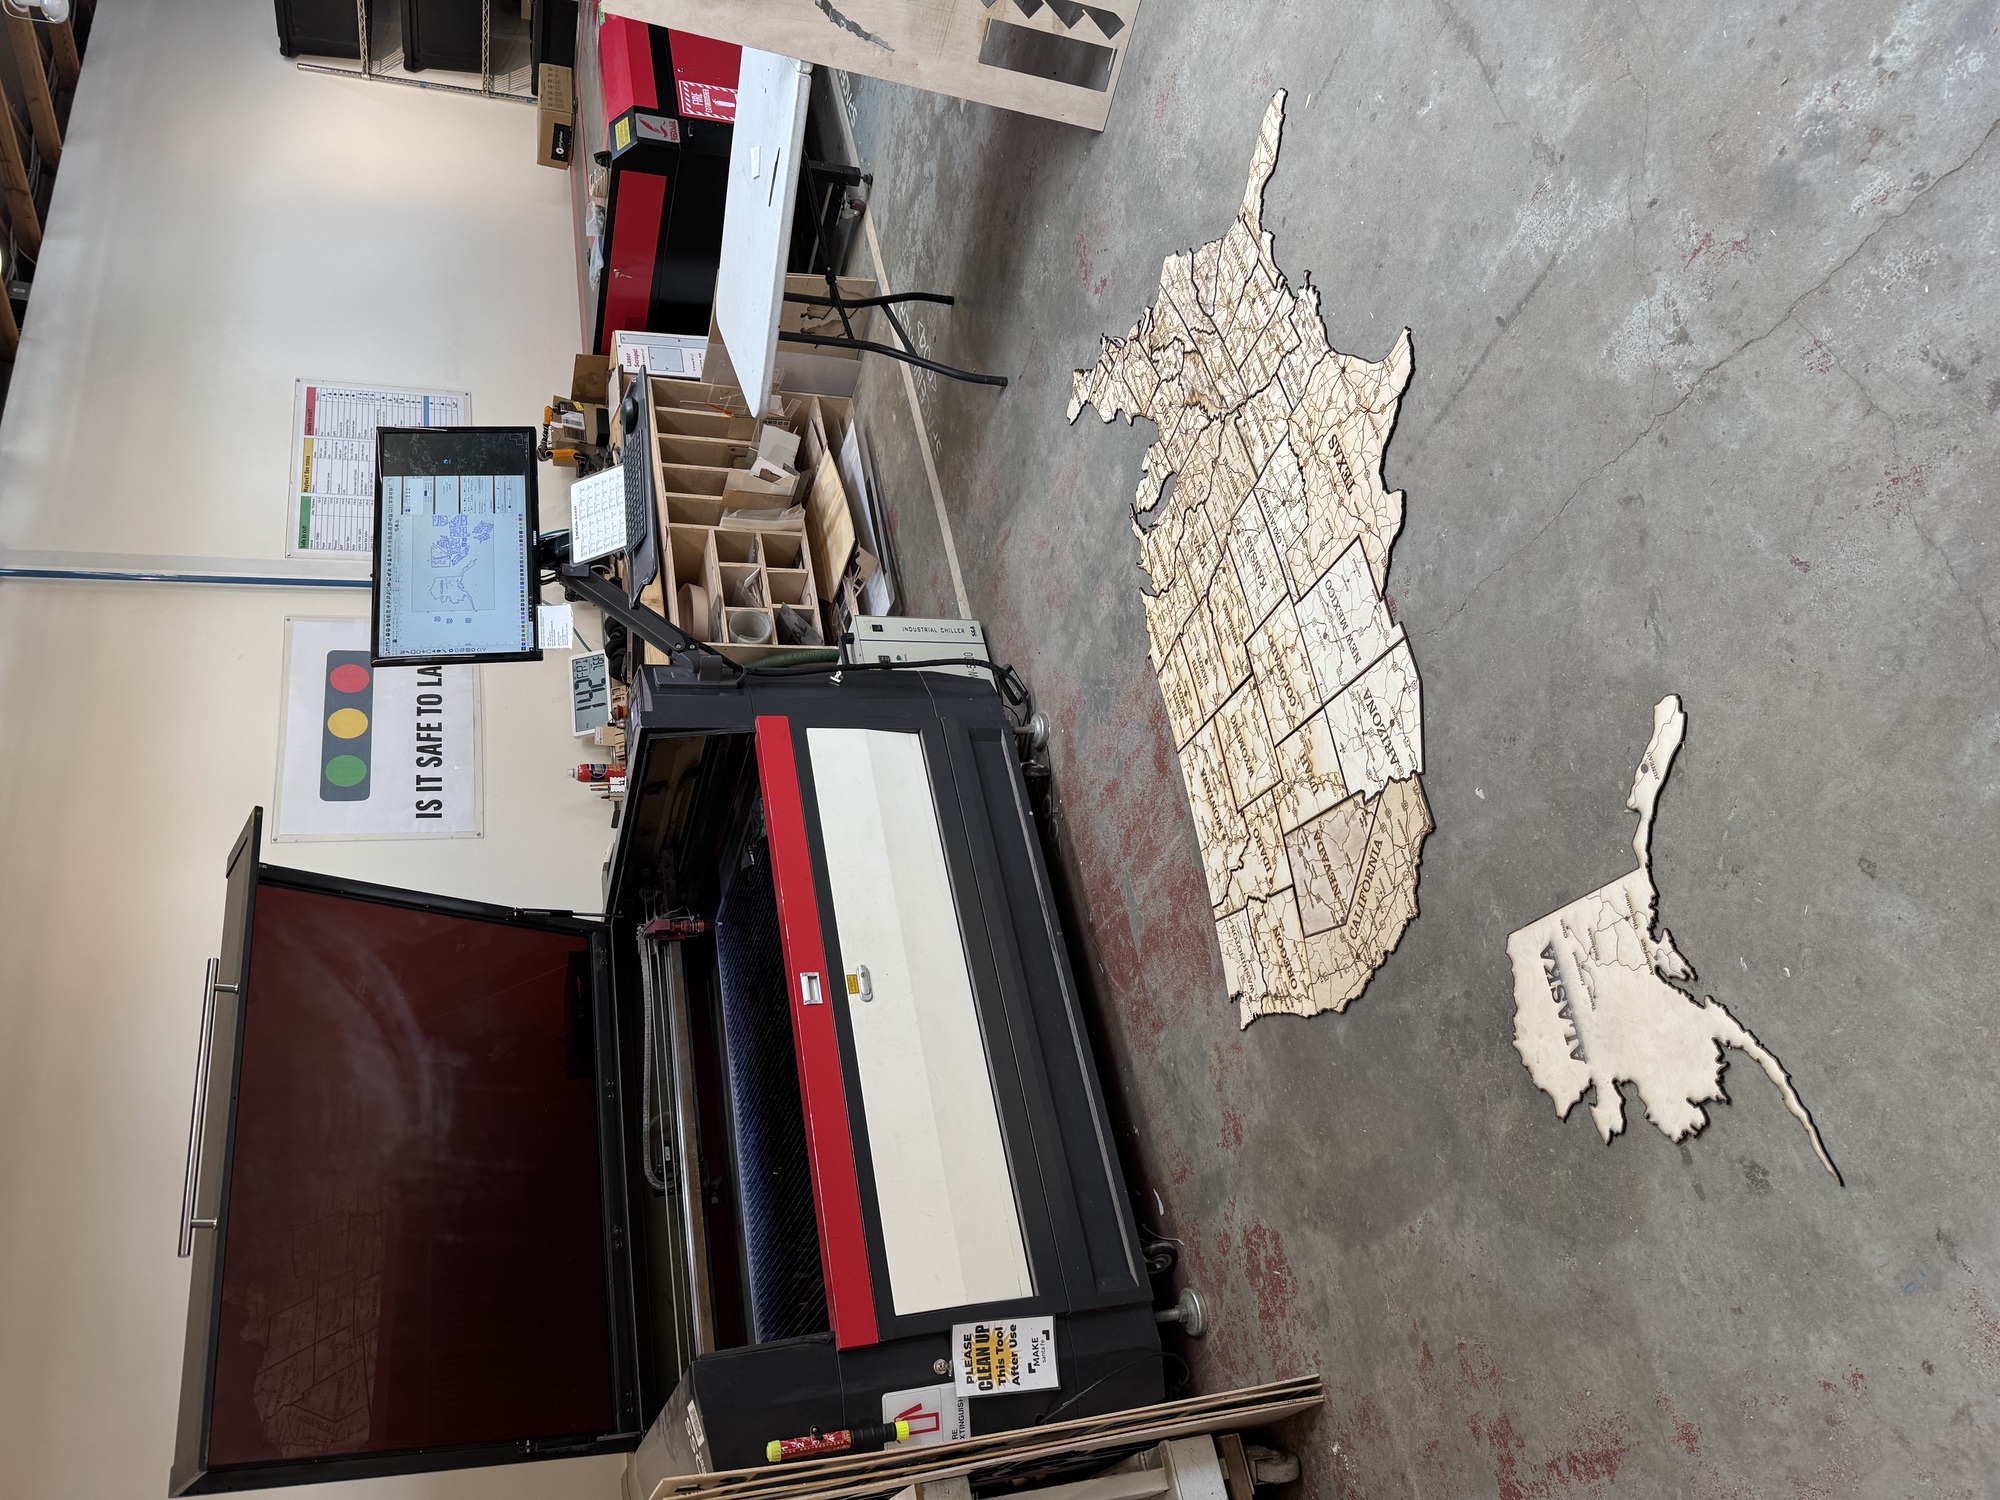
I had a lot of fun with the laser! As my first major project, I learned a LOT about how to efficiently design for it and use it. Now that all the pieces are cut, I still have to finish them with some light sanding and a wood finish. Then I'll attach magnets to the back and mount them to my 8x8' booth backdrop.
Big thanks to Randy for teaching me how to use the laser in the Laser Badge, and to Andrew for helping me with some optimization tricks!